Blog

  • Tangy Rhubarb and Cream Cheese Squares: A Creamy, Buttery Dessert with the Perfect Balance of Sweet and Tart

    Tangy Rhubarb and Cream Cheese Squares: A Creamy, Buttery Dessert with the Perfect Balance of Sweet and Tart

    Tangy Rhubarb and Cream Cheese Squares: A Creamy, Buttery Dessert with the Perfect Balance of Sweet and Tart

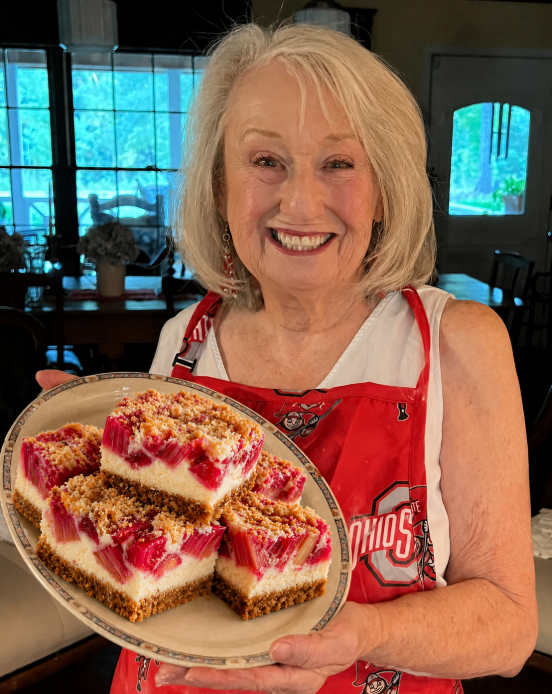
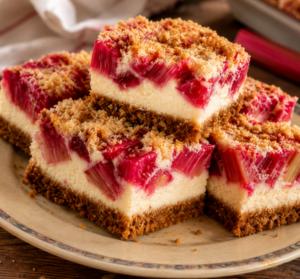
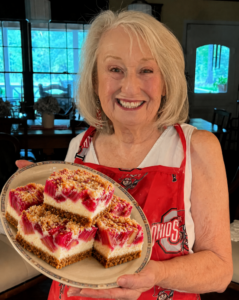
    If you have ever avoided rhubarb desserts because you expected them to be overwhelmingly sour, these Tangy Rhubarb and Cream Cheese Squares may completely change your mind. With a buttery crust, a smooth cream cheese filling, tender rhubarb, and a golden crumb topping, this dessert delivers an irresistible combination of sweet, tangy, creamy, and crunchy textures in every bite.

    Rhubarb has a naturally sharp flavor, but when it is paired with sugar, vanilla, cream cheese, and a rich buttery base, that tartness becomes one of the dessert’s greatest strengths. Instead of tasting harsh, the rhubarb brings freshness and balance to the richness of the cheesecake-style filling.

    These rhubarb cream cheese bars are ideal for spring and early summer baking, family gatherings, afternoon coffee, potlucks, holidays, or whenever you want a dessert that looks impressive without requiring complicated techniques.

    In this guide, you will learn how to make rhubarb and cream cheese squares from scratch, how to prevent them from becoming watery, how to achieve clean layers, how to store them properly, and why rhubarb deserves a place in your seasonal baking routine.
    Why You Will Love These Rhubarb Cream Cheese Squares

    There are many rhubarb recipes available, but this one stands out because of its balance of textures and flavors.

    The base is buttery and slightly crisp, giving the bars enough structure to hold their shape. The cream cheese layer is smooth, rich, and mildly sweet. Fresh rhubarb adds a bright tart flavor that cuts through the richness, while the crumb topping provides a delicious golden finish.

    Another advantage is that these bars can be prepared ahead of time. In fact, they often taste even better after chilling because the filling becomes firmer and the flavors have more time to develop.

    They are also easier to serve than traditional cheesecake. There is no need for a springform pan, water bath, or complicated slicing technique. Simply bake everything in one rectangular pan, cool thoroughly, chill, and cut into squares.

    What Does Rhubarb Taste Like?

    Rhubarb is known for its distinct tart flavor. Raw rhubarb is extremely sour and usually not eaten on its own. However, cooking rhubarb with sugar transforms its flavor.

    Once baked, rhubarb becomes soft and juicy while retaining enough acidity to keep desserts from tasting overly sweet.

    This is why rhubarb pairs so well with creamy ingredients. Cream cheese, custard, whipped cream, and vanilla all provide richness and sweetness, while rhubarb brings contrast.

    The result is a dessert that feels indulgent without becoming heavy.

    Ingredients for Tangy Rhubarb and Cream Cheese Squares

    For the Buttery Crust and Crumb Topping

    • 2 cups all-purpose flour
    • 1 cup unsalted butter, softened
    • 3/4 cup granulated sugar
    • 1/4 teaspoon salt
    • 1 teaspoon vanilla extract

    For the Cream Cheese Filling

    • 16 ounces cream cheese, softened
    • 2 large eggs
    • 3/4 cup granulated sugar
    • 1 teaspoon vanilla extract
    • 2 tablespoons all-purpose flour
    • 2 tablespoons heavy cream or sour cream

    For the Rhubarb Layer

    • 3 cups fresh rhubarb, chopped into small pieces
    • 1/3 cup granulated sugar
    • 1 tablespoon cornstarch
    • 1 teaspoon lemon juice
    • 1/2 teaspoon vanilla extract

    You can slightly adjust the amount of sugar depending on how tart your rhubarb is and how sweet you prefer your desserts.

    Choosing the Best Rhubarb

    Fresh rhubarb stalks should feel firm and crisp. Look for stalks that are brightly colored, ranging from pink and red to pale green.

    The color does not necessarily determine sweetness. Some green rhubarb varieties can be just as flavorful as red ones.

    Avoid stalks that are limp, badly bruised, or dried out.

    Most importantly, use only the stalks. Rhubarb leaves should not be eaten because they contain compounds that are unsafe for consumption.

    Wash the stalks carefully, trim both ends, and cut the rhubarb into small, evenly sized pieces before baking.

    How to Make Rhubarb and Cream Cheese Squares

    Step 1: Prepare the Baking Pan

    Preheat your oven to 350 degrees Fahrenheit.

    Line a 9 x 13-inch baking pan with parchment paper, leaving some extra paper hanging over the sides. This makes it much easier to lift the bars from the pan after chilling.

    Lightly grease any exposed areas of the pan.

    Step 2: Make the Crust Mixture

    In a large mixing bowl, combine the flour, sugar, salt, softened butter, and vanilla.

    Mix until the ingredients form a soft, crumbly dough.

    Reserve approximately one-third of this mixture for the topping.

    Press the remaining mixture firmly and evenly into the bottom of the prepared baking pan.

    Bake the crust for approximately 12 to 15 minutes, or until the edges are just beginning to turn golden.

    Remove it from the oven and allow it to cool slightly while you prepare the filling.

    Step 3: Prepare the Rhubarb

    Place the chopped rhubarb in a bowl.

    Add the sugar, cornstarch, lemon juice, and vanilla. Toss until the rhubarb is evenly coated.

    The cornstarch is especially important because rhubarb releases a considerable amount of moisture during baking. Cornstarch helps thicken those juices so the finished bars remain firm rather than watery.

    Set the mixture aside for a few minutes.

    Step 4: Make the Cream Cheese Filling

    In another large bowl, beat the softened cream cheese until smooth.

    Add the sugar and mix until creamy.

    Beat in the eggs one at a time, mixing just until incorporated.

    Add the vanilla, flour, and heavy cream or sour cream.

    Continue mixing until the filling is smooth and free of large lumps.

    Avoid overmixing once the eggs are added. Excess air can cause the filling to rise too quickly and then crack as it cools.

    Step 5: Assemble the Layers

    Pour the cream cheese mixture over the partially baked crust.

    Spread it into an even layer with a spatula.

    Distribute the rhubarb mixture evenly over the cream cheese filling.

    Some of the rhubarb may sink slightly into the filling during baking, which creates beautiful pink ribbons throughout the creamy center.

    Finally, crumble the reserved crust mixture over the top.

    You do not need to cover every inch. Small openings allow some of the colorful rhubarb to remain visible.

    Step 6: Bake the Bars

    Return the pan to the oven.

    Bake for approximately 40 to 50 minutes.

    The topping should be golden brown, and the cream cheese filling should look mostly set with only a slight movement in the center when the pan is gently shaken.

    Do not overbake. The filling will continue to firm as the dessert cools.

    Step 7: Cool Completely

    Remove the pan from the oven and place it on a cooling rack.

    Allow the bars to cool completely at room temperature.

    Afterward, refrigerate them for at least 3 hours, preferably overnight.

    Chilling is one of the most important steps because it gives the cream cheese filling enough time to become firm and sliceable.

    How to Get Clean, Bakery-Style Squares

    For neat slices, always cut the bars while they are cold.

    Lift the entire dessert from the pan using the parchment paper.

    Use a large, sharp knife and wipe the blade clean after every cut.

    For especially clean edges, dip the knife in hot water, dry it, and then make each cut.

    Cutting warm rhubarb bars often results in a softer filling and messy edges, so patience makes a noticeable difference.

    How to Prevent Watery Rhubarb Bars

    Rhubarb naturally contains a lot of water, which is one of the most common challenges when baking with it.

    There are several ways to avoid soggy bars.

    First, do not skip the cornstarch. It absorbs and thickens the juice released by the rhubarb.

    Second, cut the rhubarb into relatively small pieces. Large chunks take longer to soften and can release more moisture in isolated areas.

    Third, avoid adding significantly more rhubarb than the recipe recommends.

    Finally, cool and refrigerate the bars completely before slicing. The filling continues to set as it chills.

    Can You Use Frozen Rhubarb?

    Yes, frozen rhubarb can be used if fresh rhubarb is unavailable.

    However, frozen rhubarb usually releases more liquid.

    Thaw it first, then drain away excess moisture. Gently blot the rhubarb with paper towels before combining it with sugar and cornstarch.

    You may also want to add an additional teaspoon of cornstarch if the rhubarb seems particularly wet.

    Do not use frozen rhubarb straight from the freezer without adjusting for the extra moisture, as this can make the filling too loose.

    Flavor Variations

    Once you have mastered the basic recipe, there are several delicious variations worth trying.

    Strawberry Rhubarb Cream Cheese Bars

    Replace one cup of the rhubarb with chopped strawberries. Strawberry and rhubarb are a classic combination because the sweetness of the berries naturally softens rhubarb’s tartness.

    Raspberry Rhubarb Bars

    Fresh or frozen raspberries add another layer of tangy fruit flavor and create an even more vibrant red filling.

    Orange Rhubarb Bars

    Add one teaspoon of finely grated orange zest to the rhubarb mixture. Orange enhances the freshness of rhubarb while adding a subtle citrus aroma.

    Almond Rhubarb Bars

    Add 1/2 teaspoon almond extract to the cream cheese filling and sprinkle sliced almonds over the crumb topping before baking.

    Storage Tips

    Rhubarb cream cheese squares should be stored in the refrigerator because of the dairy-based filling.

    Place the bars in an airtight container and refrigerate them for up to 4 to 5 days.

    For the best texture, place parchment paper between layers if you need to stack the bars.

    They can be eaten directly from the refrigerator, or you can allow them to sit at room temperature for approximately 10 to 15 minutes before serving.

    Can You Freeze Rhubarb Cream Cheese Squares?

    Yes, these bars freeze surprisingly well.

    First, allow them to chill completely.

    Cut the dessert into individual squares and place the pieces on a parchment-lined tray.

    Freeze them for approximately one hour, then transfer the frozen bars to a freezer-safe container or bag.

    Separating layers with parchment paper helps prevent sticking.

    Freeze for up to 2 months.

    When ready to serve, thaw the bars overnight in the refrigerator.

    Is Rhubarb Healthy?

    Rhubarb is valued not only for its unique taste but also for its nutritional profile.

    It is naturally low in calories and contains fiber along with several vitamins and plant compounds.

    Rhubarb contains vitamin K and also provides smaller amounts of vitamin C and minerals.

    Its natural plant pigments and antioxidants are another reason rhubarb is often included in discussions about seasonal produce.

    However, it is important to remember that rhubarb desserts also contain sugar, butter, and cream cheese. Therefore, these bars should be viewed primarily as a dessert rather than a health food.

    Still, using fruit and seasonal produce in homemade desserts can be a flavorful way to enjoy ingredients that might otherwise be overlooked.

    Why Rhubarb Works So Well with Cream Cheese

    Cream cheese is rich, slightly tangy, and smooth.

    Rhubarb is sharp, fruity, and acidic.

    When combined, the two ingredients balance each other beautifully.

    The richness of the cream cheese reduces the intensity of the rhubarb, while the rhubarb prevents the filling from tasting overly rich.

    This sweet-and-tart contrast is similar to the reason lemon cheesecake, berry cheesecake, and cranberry desserts are so popular.

    The crumb topping adds a final element by introducing buttery crunch.

    Each bite contains multiple textures: crisp crust, creamy filling, soft fruit, and golden crumbs.

    Serving Suggestions

    These bars are delicious on their own, but they can also be dressed up for special occasions.

    Serve them with lightly sweetened whipped cream, vanilla ice cream, fresh strawberries, or a simple dusting of powdered sugar.

    For afternoon coffee, serve smaller squares alongside coffee or black tea.

    For parties and potlucks, arrange chilled squares on a serving tray and keep them refrigerated until shortly before serving.

    Their bright rhubarb color makes them especially attractive for spring celebrations, Mother’s Day gatherings, Easter tables, summer brunches, and garden parties.
    Frequently Asked Questions

    Do I need to peel rhubarb?

    Usually not. Fresh rhubarb stalks can be chopped and used directly after washing and trimming.

    If the stalks are unusually thick or fibrous, you can remove some of the tougher outer strings.

    Why is my rhubarb filling runny?

    The most likely causes are too much rhubarb, insufficient cornstarch, cutting the bars before they are cold, or using frozen rhubarb without draining it properly.

    Can I reduce the sugar?

    Yes, but remember that rhubarb is naturally very tart.

    You can reduce the sugar slightly, but removing too much may make the dessert noticeably sour.

    Can I make these bars one day ahead?

    Absolutely. They are actually an excellent make-ahead dessert because chilling overnight improves both the texture and flavor.

    How do I know when the cream cheese layer is done?

    The edges should appear set while the center should move only slightly when the pan is gently shaken.

    The filling will become firmer as it cools.

    Final Thoughts

    Tangy Rhubarb and Cream Cheese Squares are one of those desserts that can surprise people who think they do not like rhubarb.

    The naturally tart fruit becomes beautifully balanced when layered with creamy cheesecake filling, a buttery crust, and a golden crumb topping.

    The recipe is straightforward enough for casual home baking but attractive enough to serve for holidays and special gatherings.

    The most important secrets are simple: use fresh rhubarb when possible, control excess moisture with cornstarch, avoid overbaking the cream cheese layer, and give the finished bars plenty of time to chill before slicing.

    Once you taste the combination of sweet cream cheese, bright rhubarb, buttery crust, and crisp crumbs, it is easy to understand why rhubarb desserts have remained a seasonal favorite for generations.

    Whether you are looking for a spring dessert, a make-ahead treat for guests, or simply a new way to use fresh rhubarb, these creamy rhubarb squares deserve a place in your recipe collection.
  • Strawberry Cream Cheese Pound Cake: A Soft, Rich, Bakery-Style Dessert

    Strawberry Cream Cheese Pound Cake: A Soft, Rich, Bakery-Style Dessert

    Strawberry Cream Cheese Pound Cake: A Soft, Rich, Bakery-Style Dessert

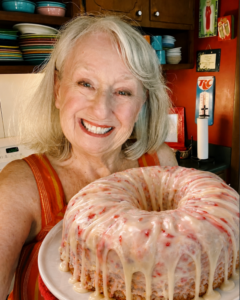
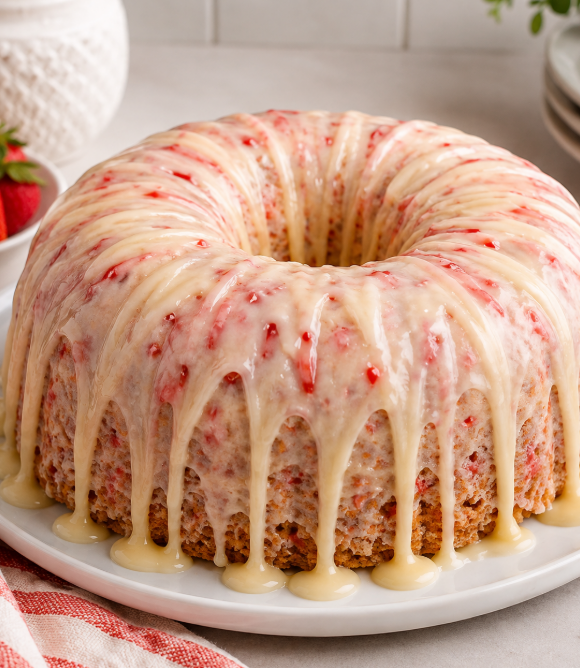
    Few desserts can compete with the combination of buttery pound cake, fresh strawberries, cream cheese, and a smooth glaze. Strawberry Cream Cheese Pound Cake brings all of those flavors together in one impressive dessert that looks elegant enough for a celebration but is simple enough to make at home.

    What makes this cake especially memorable is its texture. A traditional pound cake is known for being rich and dense, but the addition of cream cheese gives this version an exceptionally soft, moist crumb. Fresh strawberries add natural sweetness and a slightly fruity freshness that balances the richness of the butter and cream cheese.

    Finished with a creamy strawberry glaze, this cake is ideal for spring gatherings, summer parties, family dinners, holidays, birthdays, or simply enjoying with a cup of coffee.

    If you are looking for a homemade strawberry cake that tastes like it came from a bakery, this Strawberry Cream Cheese Pound Cake deserves a place in your recipe collection.
    Why You Will Love This Strawberry Cream Cheese Pound Cake

    There are many strawberry desserts, but this recipe stands out because it combines several classic baking techniques in one cake.

    The butter provides richness, the cream cheese adds moisture and a subtle tang, and the strawberries bring a fresh fruit flavor to every slice. When baked correctly, the outside develops a beautiful golden crust while the inside remains tender and soft.

    Another advantage is that this cake does not require complicated decoration. The natural Bundt shape already looks impressive, and a simple glaze creates an attractive finish.

    This recipe is especially appealing because it offers:

    • A soft and moist interior
    • Rich buttery flavor
    • Fresh strawberry pieces throughout the cake
    • A subtle cream cheese tang
    • A beautiful bakery-style appearance
    • A creamy glaze that adds sweetness without overwhelming the cake

    It is the kind of dessert that works equally well for everyday baking and special occasions.

    Ingredients for Strawberry Cream Cheese Pound Cake

    For the best results, use room-temperature ingredients whenever possible.

    For the Pound Cake

    • 1 cup unsalted butter, softened
    • 8 ounces cream cheese, softened
    • 2 1/2 cups granulated sugar
    • 6 large eggs, room temperature
    • 1 tablespoon vanilla extract
    • 3 cups all-purpose flour
    • 1 teaspoon baking powder
    • 1/2 teaspoon salt
    • 1/2 cup sour cream
    • 1 1/2 cups fresh strawberries, finely chopped
    • 1 tablespoon all-purpose flour for coating the strawberries

    For the Strawberry Cream Cheese Glaze

    • 4 ounces cream cheese, softened
    • 1 1/2 cups powdered sugar
    • 2 to 4 tablespoons milk or heavy cream
    • 1 teaspoon vanilla extract
    • 2 tablespoons finely mashed strawberries or strawberry puree

    The exact amount of milk or cream may vary depending on how thick you want the glaze.

    Why Cream Cheese Makes Pound Cake Better

    Cream cheese is one of the ingredients that gives this cake its special texture.

    Traditional pound cake depends heavily on butter and eggs for structure and richness. Cream cheese adds additional fat and moisture while also introducing a mild tanginess.

    This helps create a cake that feels rich without being dry.

    Cream cheese also contributes to a tighter crumb, which makes each slice smooth and tender. Because of this, the cake remains delicious even after sitting for a day or two.

    For the best texture, make sure the cream cheese is completely softened before mixing. Cold cream cheese can create small lumps in the batter.

    Preparing the Strawberries

    Fresh strawberries provide the strongest natural flavor.

    Wash the strawberries, remove the stems, and dry them thoroughly. Excess moisture can affect the consistency of the cake batter.

    Chop the strawberries into small pieces rather than large chunks. Smaller pieces distribute more evenly throughout the cake and reduce the risk of the fruit sinking to the bottom.

    After chopping, toss the strawberries with about one tablespoon of flour.

    This light flour coating helps keep the berries suspended in the batter while the cake bakes.

    Avoid adding strawberries that are extremely wet or overripe because too much liquid can make the center of the cake heavy.

    How to Make Strawberry Cream Cheese Pound Cake

    Step 1: Prepare the Bundt Pan

    Preheat your oven to 325°F.

    Grease a 10- to 12-cup Bundt pan generously with butter or baking spray. Make sure every groove is coated.

    Lightly dust the pan with flour and tap out the excess.

    Properly preparing the pan is important because pound cakes are heavy and can easily stick.

    Step 2: Cream the Butter and Cream Cheese

    Place the softened butter and cream cheese in a large mixing bowl.

    Beat them together for approximately two to three minutes until the mixture becomes smooth and creamy.

    This step creates the base for the cake’s tender texture.

    Step 3: Add the Sugar

    Gradually add the granulated sugar.

    Continue beating the mixture for approximately three to five minutes.

    The mixture should become noticeably lighter and fluffier.

    Creaming the fat and sugar properly creates tiny air pockets that help the cake rise during baking.

    Do not rush this step.

    Step 4: Add the Eggs

    Add the eggs one at a time.

    Mix well after each egg before adding the next.

    Adding all the eggs at once can cause the mixture to separate.

    Once all of the eggs are incorporated, mix in the vanilla extract.

    Step 5: Combine the Dry Ingredients

    In a separate bowl, whisk together:

    • All-purpose flour
    • Baking powder
    • Salt

    Mixing these ingredients separately ensures the baking powder and salt are evenly distributed.

    Step 6: Add the Flour and Sour Cream

    Add the dry ingredients to the butter mixture gradually.

    Alternate between adding the flour mixture and the sour cream.

    Begin and end with the flour.

    Mix on low speed and stop as soon as the ingredients are combined.

    Overmixing after adding the flour can develop too much gluten and make the cake tough.

    Step 7: Fold in the Strawberries

    Gently fold the flour-coated strawberries into the batter using a spatula.

    Do not use the mixer for this step.

    Folding by hand helps prevent the strawberries from breaking down and releasing too much juice into the batter.

    Step 8: Fill the Pan

    Spoon the batter evenly into the prepared Bundt pan.

    Smooth the surface with a spatula.

    Gently tap the pan on the counter a few times to remove large air pockets.

    Step 9: Bake the Cake

    Bake for approximately 75 to 90 minutes.

    Because ovens vary, begin checking the cake after about 70 minutes.

    Insert a toothpick or wooden skewer into the thickest part of the cake. It should come out clean or with a few moist crumbs.

    Avoid opening the oven repeatedly during the first hour because sudden temperature changes can cause the cake to sink.

    Step 10: Cool Carefully

    Allow the cake to cool in the pan for approximately 15 to 20 minutes.

    Then place a cooling rack over the pan and carefully invert the cake.

    Lift away the Bundt pan.

    Allow the cake to cool completely before adding the glaze.

    Glazing a warm cake will cause the icing to melt too quickly and run off.

    How to Make the Strawberry Cream Cheese Glaze

    The glaze adds another layer of strawberry and cream cheese flavor.

    Beat the softened cream cheese until smooth.

    Gradually add the powdered sugar.

    Mix in the vanilla extract and strawberry puree.

    Add milk or heavy cream one tablespoon at a time until the glaze reaches your preferred consistency.

    For a thick glaze that slowly drips down the cake, use less liquid.

    For a thinner glaze, add slightly more milk or cream.

    Once the cake has completely cooled, spoon the glaze over the top and allow it to naturally run down the sides.

    Tips for the Best Strawberry Pound Cake

    A few small baking details can make a major difference.

    Use Room-Temperature Ingredients

    Butter, cream cheese, eggs, and sour cream blend more evenly when they are not cold.

    Room-temperature ingredients help create a smoother batter and more consistent crumb.

    Measure Flour Correctly

    Too much flour is one of the most common reasons pound cake becomes dry.

    Spoon the flour into the measuring cup and level it with a knife rather than packing it tightly.

    A kitchen scale provides even more accurate results.

    Do Not Overmix

    Once the flour enters the batter, mix only until combined.

    Overmixing can make the finished cake dense or chewy.

    Grease the Bundt Pan Thoroughly

    Pay special attention to the center tube and decorative grooves.

    A properly prepared pan makes the cake much easier to release.

    Allow the Cake to Cool Before Glazing

    Patience matters here.

    If the cake is still warm, the cream cheese glaze may become thin and disappear into the cake instead of creating attractive drips.

    Can You Use Frozen Strawberries?

    Fresh strawberries are usually the best choice because they contain less excess moisture.

    However, frozen strawberries can work when fresh berries are unavailable.

    Thaw them completely, drain the liquid, and gently pat them dry with paper towels before chopping.

    You may also need slightly less fruit if the thawed strawberries are particularly soft.

    Frozen berries can release more juice during baking, so avoid adding them directly from the freezer.

    How to Store Strawberry Cream Cheese Pound Cake

    Because this cake contains fresh fruit and a cream cheese glaze, refrigeration is recommended.

    Place the cake in an airtight container or cover it tightly.

    Store it in the refrigerator for up to four or five days.

    For the best flavor and texture, allow a refrigerated slice to sit at room temperature for about 15 to 20 minutes before serving.

    This softens the butter and cream cheese slightly and restores the cake’s tender texture.

    Can You Freeze Strawberry Pound Cake?

    Yes.

    For best results, freeze the cake before adding the glaze.

    Allow the cake to cool completely, then wrap it tightly in plastic wrap followed by aluminum foil.

    Freeze for up to three months.

    Thaw overnight in the refrigerator or for several hours at room temperature.

    Once thawed, prepare and add the glaze.

    Individual slices can also be frozen, making it easy to enjoy one serving at a time.

    Serving Suggestions

    Strawberry Cream Cheese Pound Cake is delicious on its own, but it can also be served with several simple accompaniments.

    Try serving a slice with:

    • Fresh strawberries
    • Whipped cream
    • Vanilla ice cream
    • Strawberry sauce
    • Fresh raspberries or blueberries
    • Hot coffee
    • Black tea
    • A cold glass of milk

    For special occasions, arrange fresh strawberries around the base of the Bundt cake before serving.

    The contrast between the white glaze and bright red berries makes a beautiful presentation.

    When to Serve Strawberry Cream Cheese Pound Cake

    This recipe works especially well during strawberry season, but it can be enjoyed throughout the year.

    It makes an excellent dessert for:

    • Mother’s Day
    • Easter gatherings
    • Spring brunches
    • Summer cookouts
    • Birthday celebrations
    • Baby showers
    • Bridal showers
    • Family dinners
    • Afternoon coffee
    • Holiday dessert tables

    Because Bundt cakes travel well, this recipe is also a good option for potlucks and gatherings.

    Common Mistakes to Avoid

    Even experienced bakers occasionally run into problems with pound cake.

    One common mistake is baking at too high a temperature. Pound cakes are thick and require slow, even baking. If the oven is too hot, the outside may become dark before the center has finished cooking.

    Another mistake is removing the cake from the pan too quickly. The cake needs several minutes to firm up before being inverted.

    Waiting too long, however, can also cause sticking.

    Approximately 15 to 20 minutes is usually a good cooling time before removing the cake.

    Finally, avoid cutting the cake immediately.

    Pound cake continues setting as it cools. Allowing it to cool completely gives you cleaner slices and a better texture.

    Frequently Asked Questions

    Why did my strawberries sink?

    Fruit often sinks when the pieces are too large or very wet.

    Chop the strawberries finely, dry them well, and coat them lightly in flour before folding them into the batter.

    Why is my pound cake dry?

    The most common causes are too much flour, overbaking, or overmixing.

    Measure carefully and begin checking the cake before the maximum baking time.

    Can I make this cake one day ahead?

    Yes.

    In fact, pound cake often tastes even better the following day because the flavors have more time to develop.

    Store it properly in the refrigerator if it has already been glazed.

    Can I make this recipe without a Bundt pan?

    Yes.

    You can divide the batter between loaf pans, although the baking time will change.

    Begin checking smaller cakes earlier because they may finish baking faster.

    Final Thoughts

    Strawberry Cream Cheese Pound Cake is the kind of dessert that combines simple ingredients with an impressive final result.

    The buttery cake is rich yet tender, the cream cheese helps keep every slice moist, and fresh strawberries add brightness throughout the crumb. A smooth strawberry cream cheese glaze completes the cake with an attractive bakery-style finish.

    Whether you are baking for a family gathering, celebrating a special occasion, or simply looking for a new strawberry dessert to enjoy at home, this recipe is worth trying.

    Take your time during the creaming process, use room-temperature ingredients, avoid overmixing, and allow the cake to cool completely before glazing.

    Those simple steps will help you create a Strawberry Cream Cheese Pound Cake that is soft, flavorful, beautiful, and memorable from the first slice to the last.

  • 3-Ingredient Sprite Cobbler: The Easiest No-Egg, No-Butter Dessert

    3-Ingredient Sprite Cobbler: The Easiest No-Egg, No-Butter Dessert

    3-Ingredient Sprite Cobbler: The Easiest No-Egg, No-Butter Dessert

    If you have ever looked at a dessert recipe and thought, “There is absolutely no way that can work,” this 3-ingredient Sprite cobbler might change your mind.

    There are no eggs to crack, no butter to soften, and no complicated batter to prepare. You do not even need a mixing bowl. All you need are three simple ingredients, a baking dish, and a few minutes of preparation.

    The surprising ingredient is Sprite.

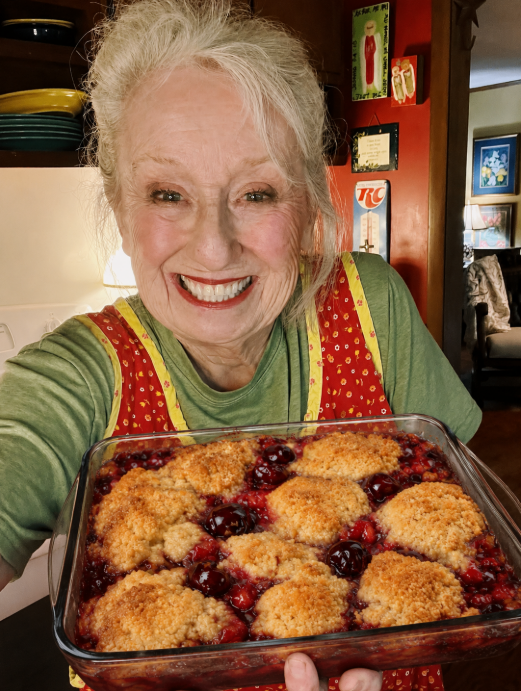
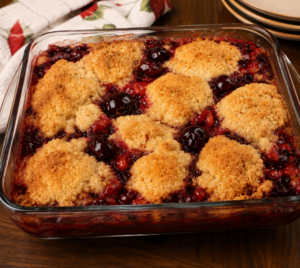
    It sounds unusual, but when the lemon-lime soda combines with dry cake mix and warm fruit filling in the oven, something wonderful happens. The topping becomes golden and slightly crisp on the surface while remaining soft underneath, and the fruit turns hot, thick, and wonderfully juicy.

    The result tastes like a comforting homemade fruit cobbler even though the preparation could hardly be easier.

    This 3-ingredient Sprite cobbler is ideal when you need a quick dessert for family dinners, holidays, potlucks, weekend gatherings, or simply when you are craving something sweet without spending an hour in the kitchen.

    Why You Will Love This 3-Ingredient Sprite Cobbler

    Some dessert recipes require a long list of ingredients, several bowls, and careful measuring. This recipe is almost the opposite.

    You simply layer the ingredients in a baking dish and let the oven do most of the work.

    One of the best things about this easy cobbler recipe is that it works well for both beginner and experienced home cooks. You do not need special baking skills, and there is very little cleanup afterward.

    It is also easy to customize. Cherry filling creates a rich and slightly tart dessert, but you can easily use peaches, blueberries, apples, strawberries, or another favorite fruit filling.

    The basic idea remains the same.

    Fruit goes into the bottom of the baking dish, dry cake mix goes over the fruit, and Sprite provides the moisture needed to transform the topping while everything bakes.

    Ingredients for 3-Ingredient Sprite Cobbler

    You only need three ingredients:

    • 2 cans cherry pie filling, approximately 21 ounces each
    • 1 box yellow cake mix, approximately 15 to 16 ounces
    • 1 can Sprite or another lemon-lime soda, approximately 12 ounces

    That is it.

    There are no eggs, no butter, and no milk required.

    Choosing the Fruit Filling

    Cherry pie filling works especially well because its slightly tart flavor balances the sweetness of the cake mix and soda.

    However, this recipe is extremely flexible.

    You can also try:

    • Peach pie filling
    • Apple pie filling
    • Blueberry pie filling
    • Strawberry pie filling
    • Blackberry pie filling
    • Mixed berry pie filling

    If you enjoy combining flavors, use one can of cherry filling and one can of blueberry filling.

    Peach and cherry can also create an interesting combination.

    The important thing is to use enough fruit filling to create a generous layer across the bottom of the baking dish. If the fruit layer is too thin, the cobbler may become dry.

    What Kind of Cake Mix Should You Use?

    Yellow cake mix is one of the best choices for this easy Sprite cobbler because it has a warm vanilla flavor that pairs well with almost any fruit.

    White cake mix can also work if you prefer a lighter flavor.

    For additional variety, consider using:

    • Vanilla cake mix
    • Butter-style cake mix
    • Spice cake mix with apple filling
    • Lemon cake mix with blueberry filling
    • Chocolate cake mix with cherry filling

    Keep in mind that different cake mixes absorb liquid differently, so the finished texture may vary slightly.

    For your first attempt, a standard yellow cake mix is the safest and most reliable option.

    Why Does Sprite Work in Cobbler?

    Sprite might sound like an unusual baking ingredient, but there is a simple reason it works.

    Cake mix already contains flour, sugar, flavorings, and leavening ingredients. Normally, a cake mix recipe requires eggs, oil, water, or other liquids to activate those dry ingredients.

    In this cobbler, Sprite supplies the moisture.

    The carbonation can also help create a lighter texture in certain areas of the topping. As the dessert bakes, the soda is absorbed into the cake mix while fruit juices rise from underneath.

    The result is not exactly like a traditional cake.

    Instead, the topping develops uneven textures that are part of the appeal. Some areas become crisp and golden, while other sections remain tender and almost dumpling-like.

    Underneath, the fruit becomes bubbly and syrupy.

    How to Make 3-Ingredient Sprite Cobbler

    Step 1: Preheat the Oven

    Preheat your oven to 350°F, or approximately 175°C.

    Lightly grease a 9 x 13-inch baking dish if desired. This is not always necessary because the fruit filling contains plenty of moisture, but a light coating can make cleanup easier.

    Step 2: Add the Fruit Filling

    Pour both cans of cherry pie filling into the baking dish.

    Spread the filling evenly so the entire bottom of the dish is covered.

    Try to distribute the cherries evenly rather than leaving large piles in one area.

    Step 3: Add the Cake Mix

    Open the box of dry cake mix and sprinkle it evenly over the fruit filling.

    Do not prepare the cake mix according to the instructions on the box.

    You are using the powder directly from the package.

    Try to create an even layer across the fruit. Breaking up large lumps of cake mix will help the Sprite absorb more evenly during baking.

    Step 4: Pour Sprite Over the Top

    Slowly pour the Sprite over the cake mix.

    Move across the entire baking dish as you pour rather than adding all the soda to one spot.

    The goal is to moisten as much of the dry cake mix as possible.

    Do not aggressively stir the layers together.

    Part of the cobbler texture comes from allowing the fruit, cake mix, and soda to bake in separate but connected layers.

    If you notice a few small dry patches, that is usually fine. They often become crisp during baking.

    Step 5: Bake the Cobbler

    Place the baking dish in the preheated oven.

    Bake for approximately 40 to 50 minutes.

    The exact cooking time can vary depending on your oven, baking dish, and type of fruit filling.

    Your cobbler is ready when the fruit is bubbling around the edges and the topping looks golden brown.

    If some areas of the topping still appear completely dry and powdery near the end of baking, you can carefully drizzle a small amount of additional Sprite over those areas and return the cobbler to the oven.

    Step 6: Let It Rest

    Remove the cobbler from the oven and allow it to rest for approximately 10 to 15 minutes before serving.

    This resting period is important because the fruit filling will be extremely hot immediately after baking.

    It also gives the juices time to thicken slightly.

    What Does Sprite Cobbler Taste Like?

    The flavor is much more traditional than the ingredient list might suggest.

    You are not likely to take a bite and immediately think that the dessert contains soda.

    Instead, you taste warm fruit, vanilla cake, caramelized edges, and a soft baked topping.

    The Sprite mainly helps create the texture and moisture.

    Cherry filling makes the dessert particularly rich and colorful. The tartness from the cherries keeps the sweetness from becoming overwhelming.

    When served warm, the contrast between bubbling fruit and golden topping makes this dessert especially comforting.

    The Best Way to Serve Sprite Cobbler

    This dessert is delicious by itself, but serving it warm with something cold and creamy makes it even better.

    A scoop of vanilla ice cream is probably the most popular choice.

    As the ice cream begins to melt over the warm cobbler, it mixes with the cherry filling and creates a creamy fruit sauce.

    You can also serve it with:

    • Whipped cream
    • Vanilla custard
    • Greek yogurt
    • Frozen yogurt
    • A small amount of powdered sugar

    For gatherings, place the warm baking dish on the table and allow everyone to spoon their own serving into dessert bowls.

    Tips for the Best 3-Ingredient Cobbler

    Although this recipe is incredibly easy, a few small details can improve the final result.

    Spread the Cake Mix Evenly

    Large piles of dry cake mix can remain powdery after baking.

    Use the back of a spoon to gently spread the mixture into an even layer before adding Sprite.

    Pour the Sprite Slowly

    Pouring slowly gives you better control and helps distribute the liquid across the entire surface.

    Do Not Overmix

    It may be tempting to stir everything together, but this recipe works best when the ingredients remain layered.

    Watch the Final 10 Minutes

    Every oven behaves slightly differently.

    Check the cobbler near the end of the baking time. You want a golden surface and bubbling fruit without burning the edges.

    Let It Cool Slightly

    Fruit fillings hold heat for a long time.

    Waiting several minutes before serving makes the dessert easier to eat and improves its texture.

    Easy Variations to Try

    Once you have made the basic version, you can create dozens of variations.

    Peach Sprite Cobbler

    Use two cans of peach pie filling with yellow or vanilla cake mix.

    The flavor is sweet, warm, and perfect for summer.

    Apple Cinnamon Cobbler

    Use apple pie filling and spice cake mix.

    This version is especially good during fall and winter.

    Blueberry Lemon Cobbler

    Combine blueberry pie filling with lemon cake mix.

    The lemon and blueberry flavors work beautifully together.

    Cherry Chocolate Cobbler

    Use cherry pie filling with chocolate cake mix.

    It creates a dessert inspired by chocolate-covered cherries.

    Mixed Berry Cobbler

    Use strawberry, blueberry, blackberry, or mixed berry filling with white or vanilla cake mix.

    This version has a bright fruit flavor and beautiful color.

    Can You Use Diet Sprite?

    Yes, diet or zero-sugar lemon-lime soda can generally be used in this recipe.

    The final taste and texture may be slightly different because artificial sweeteners behave differently from regular sugar during baking, but the recipe can still work.

    Regular Sprite usually creates the most traditional result.

    You can also experiment with other lemon-lime sodas.

    The brand is less important than the carbonation and liquid content.

    Can You Make Sprite Cobbler Ahead of Time?

    You can bake the cobbler several hours before serving.

    However, it is usually at its best when served warm on the same day it is prepared.

    As the cobbler sits, the topping gradually absorbs moisture from the fruit filling and becomes softer.

    That does not make it bad, but you may lose some of the contrast between the crisp topping and soft fruit.

    If preparing it ahead, allow the dessert to cool, cover it, and reheat individual servings before serving.

    How to Store Leftover Cobbler

    Allow leftover cobbler to cool completely.

    Cover the baking dish tightly or transfer the leftovers to an airtight container.

    Store in the refrigerator for approximately 3 to 4 days.

    To reheat, microwave individual servings until warm.

    For a slightly firmer topping, reheat the cobbler in the oven at around 325°F until heated through.

    Can You Freeze Sprite Cobbler?

    You can freeze leftover cobbler, although the topping may become softer after thawing.

    Place cooled portions in freezer-safe containers and freeze for up to approximately 2 months.

    Thaw overnight in the refrigerator before reheating.

    For the best taste and texture, this dessert is usually better freshly baked.

    Why This Easy Cobbler Is Perfect for Busy Families

    Recipes like this are useful because they remove many of the barriers that stop people from baking homemade desserts.

    You do not need expensive equipment.

    You do not need advanced baking experience.

    You do not need to wash several mixing bowls.

    And you do not need a refrigerator full of special ingredients.

    Keeping a box of cake mix, a couple of cans of fruit filling, and a bottle or can of lemon-lime soda in your pantry means you can prepare dessert almost anytime.

    It is particularly useful when unexpected guests arrive or when you suddenly need something sweet for a family gathering.

    Frequently Asked Questions

    Do I Really Not Need Eggs?

    Correct. Eggs are not required for this version of the recipe.

    The cake mix is used as a cobbler topping rather than being prepared as a traditional cake batter.

    Do I Need Butter?

    No.

    Unlike many dump cake recipes that use sliced or melted butter over dry cake mix, this recipe uses Sprite to provide the necessary moisture.

    Should I Mix Everything Together?

    No.

    Layering the ingredients produces a better cobbler-style texture.

    Can I Use Fresh Fruit?

    You can experiment with fresh fruit, but canned pie filling provides both fruit and thickened syrup, which helps create the correct consistency.

    If you use fresh fruit, you may need additional sugar and thickener.

    Why Is Some Cake Mix Still Dry?

    This usually happens when the Sprite does not reach every section of the cake mix.

    Small crisp areas are perfectly fine, but large patches of powder can be avoided by pouring the soda slowly and evenly.

    Final Thoughts

    This 3-ingredient Sprite cobbler is proof that a homemade dessert does not need to be complicated.

    With nothing more than fruit pie filling, dry cake mix, and lemon-lime soda, you can create a warm dessert with bubbling fruit and a golden baked topping.

    There are no eggs to measure, no butter to melt, and no batter to mix.

    The recipe is quick enough for busy weeknights but tasty enough to serve at family gatherings, potlucks, holidays, or weekend dinners.

    Perhaps the best part is how easy it is to make the recipe your own.

    Start with cherry, then experiment with peach, apple, blueberry, or mixed berries. Change the cake mix and you can create an entirely different dessert without learning a new technique.

    If you love simple homemade desserts that deliver impressive results with minimal effort, this 3-ingredient Sprite cobbler deserves a place in your recipe collection.

  • Easy Orange Creamsicle Cake Recipe: Moist, Creamy, and Full of Fresh Citrus Flavor

    Easy Orange Creamsicle Cake Recipe: Moist, Creamy, and Full of Fresh Citrus Flavor

    Easy Orange Creamsicle Cake Recipe: Moist, Creamy, and Full of Fresh Citrus Flavor

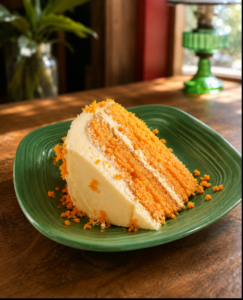
    There is something special about a dessert that instantly brings back childhood memories. This Orange Creamsicle Cake is exactly that kind of recipe. With soft orange-flavored cake layers, smooth creamy frosting, and a bright citrus aroma, every bite tastes like a classic orange-and-vanilla creamsicle transformed into a homemade cake.

    At first glance, this may look like another simple orange cake. But once you taste it, you will understand why it quickly becomes a favorite. The combination of fresh orange flavor and rich vanilla cream creates a dessert that is refreshing, comforting, and incredibly satisfying at the same time.

    Even better, this Orange Creamsicle Cake is surprisingly easy to prepare. You do not need complicated baking techniques or difficult-to-find ingredients. With a few simple tips, you can make a cake that stays moist, tender, and flavorful even the next day.

    Whether you are baking for a birthday, family gathering, weekend dessert, holiday table, or simply because you are craving something sweet, this easy orange cake recipe deserves a place in your recipe collection.

    Why You Will Love This Orange Creamsicle Cake

    The biggest reason this cake stands out is its balance of flavors. Orange desserts can sometimes taste too sweet or too sharp, but this recipe combines fresh citrus with creamy vanilla to create a softer, smoother flavor.

    The cake itself is tender and moist, while the frosting adds richness without overpowering the orange. Fresh orange zest and orange juice give the cake a natural citrus taste that is much better than relying only on artificial flavoring.

    Another advantage is that this recipe can be prepared ahead of time. In fact, the cake often tastes even better after resting for several hours because the flavors have more time to develop.

    This cake is also easy to customize. You can make it as a layered celebration cake, a simple sheet cake, cupcakes, or even a small family-style dessert.

    Ingredients for Orange Creamsicle Cake

    For the orange cake layers, you will need:

    • 2 1/2 cups all-purpose flour
    • 2 1/2 teaspoons baking powder
    • 1/2 teaspoon salt
    • 3/4 cup unsalted butter, softened
    • 1 3/4 cups granulated sugar
    • 4 large eggs, room temperature
    • 1 tablespoon fresh orange zest
    • 1/2 cup fresh orange juice
    • 1 teaspoon vanilla extract
    • 1 teaspoon orange extract, optional
    • 1 cup whole milk or buttermilk
    • A small amount of orange food coloring, optional

    For the creamy vanilla-orange frosting:

    • 1 cup unsalted butter, softened
    • 8 ounces cream cheese, softened
    • 4 to 5 cups powdered sugar
    • 1 teaspoon vanilla extract
    • 1 teaspoon orange zest
    • 1 to 2 tablespoons fresh orange juice
    • Pinch of salt

    For decoration, you can use:

    • Fresh orange zest
    • Orange cake crumbs
    • Thin orange slices
    • White chocolate shavings

    Why Fresh Orange Makes a Difference

    Fresh orange is the key ingredient that gives this cake its bright and natural flavor.

    Orange juice adds acidity, moisture, and sweetness, while orange zest contains flavorful oils that provide a stronger citrus aroma. For the best result, always zest the orange before juicing it.

    When zesting, remove only the bright orange outer layer. Avoid the white pith underneath because it can taste bitter.

    Freshly squeezed orange juice is preferable to bottled juice because its flavor is cleaner and more fragrant. However, bottled juice can still work if fresh oranges are unavailable.

    How to Make Orange Creamsicle Cake

    Step 1: Prepare the Cake Pans

    Preheat your oven to 350°F, or about 175°C.

    Grease two or three round cake pans and line the bottoms with parchment paper. Lightly flour the sides if desired.

    Preparing the pans properly makes it much easier to remove the cakes after baking.

    Step 2: Combine the Dry Ingredients

    In a medium bowl, whisk together the flour, baking powder, and salt.

    Mixing these ingredients separately helps distribute the baking powder evenly throughout the batter.

    Set the bowl aside while you prepare the wet ingredients.

    Step 3: Cream the Butter and Sugar

    Place the softened butter and granulated sugar in a large mixing bowl.

    Beat them together for about three to four minutes until the mixture becomes light and fluffy.

    This step is important because creaming incorporates air into the batter, helping the cake become softer and lighter.

    Do not rush this process.

    Step 4: Add the Eggs

    Add the eggs one at a time, mixing well after each addition.

    Using room-temperature eggs helps them blend more smoothly with the butter mixture.

    Scrape down the sides of the bowl as needed.

    Step 5: Add the Orange Flavor

    Mix in the orange zest, orange juice, vanilla extract, and orange extract if using.

    The orange extract is optional, but a small amount can strengthen the citrus flavor without changing the texture of the cake.

    If you want a stronger orange color, you can add a very small amount of orange food coloring. This is completely optional.

    Step 6: Add the Flour and Milk

    Add the dry ingredients to the butter mixture in three additions, alternating with the milk or buttermilk.

    Begin and end with the flour mixture.

    Mix only until everything is combined.

    Overmixing can develop too much gluten and make the cake dense instead of tender.

    Step 7: Bake the Cake

    Divide the batter evenly between the prepared pans.

    Bake for approximately 25 to 30 minutes, depending on the size of your pans.

    The cakes are ready when a toothpick inserted into the center comes out clean or with only a few moist crumbs.

    Avoid overbaking because even a few extra minutes can dry out a soft citrus cake.

    Allow the cakes to cool in the pans for about 10 minutes before transferring them to a cooling rack.

    Let them cool completely before frosting.

    How to Make Creamy Orange Vanilla Frosting

    The frosting is what gives this dessert its signature creamsicle flavor.

    Beat the softened butter and cream cheese together until smooth and creamy.

    Gradually add powdered sugar, one cup at a time.

    Once the frosting begins to thicken, add the vanilla extract, orange zest, orange juice, and a pinch of salt.

    Beat until light and fluffy.

    If the frosting is too thick, add another teaspoon of orange juice. If it becomes too soft, add a little more powdered sugar.

    The finished frosting should be creamy enough to spread but firm enough to hold between cake layers.

    How to Assemble the Cake

    Make sure your cake layers are completely cool before assembling.

    Place the first cake layer on a serving plate or cake board.

    Spread an even layer of frosting over the top.

    Add the next cake layer and repeat.

    Once all layers are stacked, spread a thin coating of frosting around the outside of the cake. This first layer is sometimes called a crumb coat because it traps loose cake crumbs.

    Refrigerate the cake for about 20 minutes.

    Then add the final layer of frosting.

    For a homemade appearance, you do not need perfectly smooth frosting. Soft swirls and textured frosting can make the cake look especially inviting.

    Finish with orange zest, orange-colored cake crumbs, or fresh orange slices.

    The Secret to an Extra Moist Orange Cake

    One of the most common problems with homemade cakes is dryness. Fortunately, several simple techniques can prevent it.

    First, measure your flour correctly. Scooping flour directly from the container can pack too much flour into the measuring cup. Instead, spoon the flour into the cup and level it with a knife.

    Second, avoid overbaking. Start checking the cake a few minutes before the recommended baking time ends.

    Third, use room-temperature ingredients whenever possible. Butter, eggs, and milk combine more evenly at room temperature, creating a smoother batter.

    Buttermilk can also make the cake especially soft because its acidity helps tenderize the crumb.

    For an additional boost of moisture, you can brush the cooled cake layers lightly with orange simple syrup before frosting.

    Easy Orange Simple Syrup

    To make orange syrup, combine:

    • 1/4 cup fresh orange juice
    • 1/4 cup granulated sugar

    Heat the mixture gently until the sugar dissolves.

    Allow it to cool completely.

    Brush a small amount over each cake layer before adding frosting.

    Do not soak the cake. A light coating is enough to add moisture and citrus flavor.

    Why This Cake Tastes Better the Next Day

    Orange Creamsicle Cake is an excellent make-ahead dessert.

    After the cake rests in the refrigerator for several hours, the orange flavor becomes more noticeable and the frosting slightly softens the cake layers.

    This creates a beautifully moist texture.

    If possible, prepare the cake the evening before you plan to serve it. Cover it carefully and refrigerate overnight.

    Before serving, allow the cake to sit at room temperature for approximately 20 to 30 minutes. The frosting will become softer and the cake flavor will be more pronounced.

    Variations You Can Try

    This recipe is easy to adapt depending on your preferences.

    Orange Creamsicle Cupcakes

    Divide the batter among lined muffin cups and bake until a toothpick comes out clean.

    Top each cupcake with orange vanilla frosting.

    These are especially convenient for parties because they do not require slicing.

    Orange Creamsicle Sheet Cake

    Pour the batter into a prepared rectangular baking pan.

    Once cooled, spread frosting across the top.

    A sheet cake is perfect when you need to serve a larger group.

    Mandarin Orange Cake

    Replace part of the fresh orange juice with mandarin orange juice.

    You can also decorate the finished cake with drained mandarin orange slices.

    Orange White Chocolate Cake

    Add white chocolate shavings between the layers or over the frosting.

    White chocolate pairs beautifully with citrus and gives the cake a richer flavor.

    Lemon Orange Creamsicle Cake

    Replace part of the orange zest with lemon zest.

    The lemon adds extra brightness while still allowing the orange flavor to remain dominant.

    How to Store Orange Creamsicle Cake

    Because the frosting contains cream cheese, the cake should be stored in the refrigerator.

    Place it in an airtight cake container or cover it carefully to prevent it from drying out.

    It will usually remain fresh for three to four days.

    For the best texture, allow individual slices to sit at room temperature for about 15 minutes before eating.

    You can also freeze unfrosted cake layers.

    Wrap each completely cooled layer tightly in plastic wrap and then aluminum foil. Freeze for up to two months.

    Thaw the layers in the refrigerator before assembling the cake.

    Common Baking Mistakes to Avoid

    Even a simple cake recipe can go wrong if a few important details are overlooked.

    Do not use cold butter. It will not cream properly with the sugar.

    Do not overmix after adding the flour. Mix only until the ingredients come together.

    Do not open the oven repeatedly during baking because sudden temperature changes can cause the cake to sink.

    Do not frost warm cake layers. Warm cake can melt the frosting and make the layers slide.

    Finally, do not skip the orange zest. Juice alone provides citrus flavor, but zest adds the strong fresh orange aroma that makes this cake special.

    What to Serve With Orange Creamsicle Cake

    This cake is delicious by itself, but several simple additions pair beautifully with it.

    Fresh berries provide a slightly tart contrast to the sweet frosting.

    Vanilla ice cream makes the dessert even more indulgent.

    Fresh whipped cream works well if you prefer something lighter.

    Coffee and black tea are also excellent choices because their slight bitterness balances the sweetness of the cake.

    For summer gatherings, serve the cake chilled with fresh strawberries or raspberries.

    Frequently Asked Questions

    Can I use bottled orange juice?

    Yes. Fresh orange juice provides the best flavor, but bottled orange juice can be used when necessary.

    Can I make this cake without orange extract?

    Absolutely. Orange extract intensifies the citrus flavor but is not required. Fresh zest and juice still provide plenty of orange flavor.

    Can I prepare the cake ahead of time?

    Yes. This cake is actually ideal for preparing one day ahead because the flavor and texture improve after resting.

    Why is my orange cake dry?

    The most common causes are too much flour or overbaking. Measure the flour carefully and begin checking the cake before the maximum baking time.

    Can I freeze Orange Creamsicle Cake?

    The unfrosted layers freeze extremely well. The fully assembled cake can also be frozen, although the frosting texture may change slightly after thawing.

    Final Thoughts

    Orange Creamsicle Cake combines everything people love about homemade desserts: soft cake layers, creamy frosting, bright citrus flavor, and a familiar vanilla-orange combination that feels both nostalgic and refreshing.

    It looks impressive enough for celebrations but is simple enough for an ordinary weekend baking project.

    The best part is how adaptable it is. You can turn it into cupcakes, a sheet cake, or a layered birthday cake. You can add extra orange zest for stronger citrus flavor, use buttermilk for an especially tender texture, or brush the cake layers with orange syrup to keep them beautifully moist.

    And if you can wait until the following day before eating the last slice, you may discover that it tastes even better.

    If you are looking for an easy orange cake recipe that is creamy, moist, flavorful, and memorable, this Orange Creamsicle Cake is definitely worth trying.

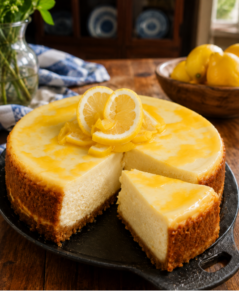
  • Creamy Lemon Cheesecake with Homemade Lemon Curd: The Ultimate Step-by-Step Recipe

    Creamy Lemon Cheesecake with Homemade Lemon Curd: The Ultimate Step-by-Step Recipe

    Creamy Lemon Cheesecake with Homemade Lemon Curd: The Ultimate Step-by-Step Recipe

    There is something special about a homemade lemon cheesecake. It combines the richness of classic cheesecake with the fresh, bright flavor of lemon, creating a dessert that feels both indulgent and refreshing at the same time.

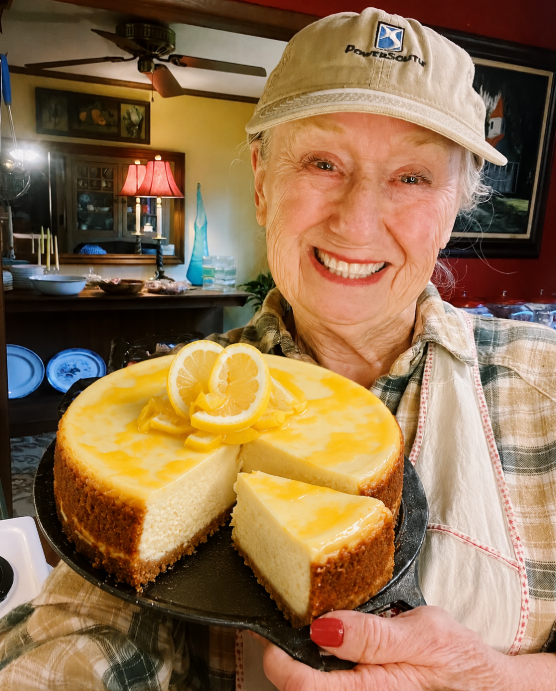
    This creamy lemon cheesecake with homemade lemon curd is the kind of dessert that immediately gets attention when it reaches the table. The filling is smooth, rich, and perfectly balanced, while the lemon curd topping adds an extra layer of fresh citrus flavor.

    What makes this recipe even better is that you do not need professional baking experience to make it. With a few simple techniques, you can create a bakery-style lemon cheesecake at home with a silky texture, a buttery crust, and a beautiful glossy lemon topping.

    Whether you are preparing dessert for a family dinner, birthday, holiday celebration, afternoon coffee, or simply because you are craving something sweet, this lemon cheesecake recipe is worth saving.

    Why You Will Love This Lemon Cheesecake

    A good cheesecake should be creamy without feeling too heavy, sweet without being overwhelming, and flavorful enough that every bite feels satisfying.

    This lemon cheesecake delivers exactly that.

    The fresh lemon juice and zest cut through the richness of the cream cheese and give the filling a light citrus flavor. The buttery biscuit crust adds texture, while the homemade lemon curd creates a smooth, tangy finish.

    Another advantage of this recipe is that the cheesecake can be prepared ahead of time. In fact, cheesecake usually tastes even better after resting overnight in the refrigerator.

    That makes it an excellent dessert when you are entertaining guests and want to prepare most of the food in advance.

    Ingredients for Lemon Cheesecake

    For the best results, allow the refrigerated ingredients to come to room temperature before mixing.

    For the Crust

    • 2 cups graham cracker crumbs or crushed digestive biscuits
    • 5 tablespoons unsalted butter, melted
    • 2 tablespoons granulated sugar
    • Pinch of salt

    For the Lemon Cheesecake Filling

    • 24 ounces cream cheese, softened
    • 1 cup granulated sugar
    • 1 cup sour cream
    • 3 large eggs
    • 2 tablespoons all-purpose flour or cornstarch
    • 1 tablespoon finely grated lemon zest
    • 1/4 cup fresh lemon juice
    • 1 teaspoon vanilla extract
    • Pinch of salt

    For the Homemade Lemon Curd

    • 3 large egg yolks
    • 1/2 cup granulated sugar
    • 1/3 cup fresh lemon juice
    • 1 tablespoon lemon zest
    • 4 tablespoons unsalted butter
    • Pinch of salt

    Optional Garnish

    • Fresh lemon slices
    • Thin strips of lemon zest
    • Whipped cream
    • Fresh berries

    How to Make the Cheesecake Crust

    Preheat the oven to 325°F.

    Prepare a 9-inch springform pan by lightly greasing the bottom and sides. If you plan to use a water bath, wrap the outside of the pan tightly with several layers of aluminum foil.

    Place the graham cracker crumbs in a bowl. Add the melted butter, sugar, and a small pinch of salt.

    Mix until all of the crumbs are evenly coated.

    The mixture should resemble wet sand and hold together when pressed between your fingers.

    Transfer the crust mixture into the prepared springform pan.

    Using the bottom of a measuring cup or drinking glass, press the crumbs firmly and evenly across the bottom of the pan.

    Bake the crust for approximately 8 to 10 minutes.

    Remove it from the oven and allow it to cool slightly while preparing the cheesecake filling.

    How to Make a Smooth Lemon Cheesecake Filling

    The texture of cheesecake depends heavily on how the filling is mixed.

    Place the softened cream cheese into a large mixing bowl.

    Beat on low to medium speed until smooth and creamy. Avoid whipping too much air into the cream cheese because excess air can cause the cheesecake to rise too quickly and crack during baking.

    Add the sugar and mix until combined.

    Next, add the sour cream, lemon juice, lemon zest, vanilla extract, flour or cornstarch, and salt.

    Mix just until smooth.

    Add the eggs one at a time, mixing on low speed after each addition.

    Once the final egg has been incorporated, stop mixing.

    Overmixing after the eggs are added is one of the most common reasons cheesecakes develop cracks.

    Pour the filling over the prepared crust.

    Use a spatula to gently smooth the surface.

    Should You Use a Water Bath?

    A water bath is one of the easiest ways to create an especially creamy cheesecake.

    The hot water creates gentle, even heat around the springform pan. This helps prevent the outside of the cheesecake from baking much faster than the center.

    To prepare a water bath, place the wrapped springform pan inside a larger roasting pan.

    Carefully pour hot water into the roasting pan until the water reaches about halfway up the outside of the springform pan.

    Be careful not to splash water into the cheesecake.

    If you prefer not to place the cheesecake directly in water, you can also place a separate pan of hot water on the lower oven rack. This still creates moisture inside the oven, although the effect is slightly different.

    Baking the Lemon Cheesecake

    Bake the cheesecake at 325°F for approximately 55 to 70 minutes.

    The exact baking time will depend on your oven and the depth of your pan.

    The cheesecake is ready when the edges look set but the center still has a slight wobble.

    Do not wait until the entire center looks completely firm. Cheesecake continues to set as it cools.

    Turn off the oven and slightly open the oven door.

    Leave the cheesecake inside for approximately 30 to 45 minutes.

    This gradual cooling process reduces the sudden temperature change that can cause cracking.

    Remove the cheesecake from the oven and allow it to cool completely at room temperature.

    Once cooled, cover it and refrigerate for at least 6 hours.

    For the best flavor and texture, refrigerate overnight.

    How to Make Homemade Lemon Curd

    While the cheesecake is chilling, prepare the lemon curd.

    Homemade lemon curd may sound complicated, but it only requires a few ingredients.

    Place the egg yolks, sugar, lemon juice, lemon zest, and salt in a heatproof bowl.

    Set the bowl over a saucepan containing gently simmering water.

    Make sure the bottom of the bowl does not touch the water.

    Whisk continuously while the mixture cooks.

    After several minutes, the lemon mixture will begin to thicken.

    Continue cooking until it becomes thick enough to coat the back of a spoon.

    Remove the bowl from the heat.

    Add the butter one tablespoon at a time, stirring until completely melted and incorporated.

    Allow the lemon curd to cool.

    It will continue thickening as it cools.

    Once both the cheesecake and lemon curd are completely chilled, spread the curd evenly over the top of the cheesecake.

    The Secret to Creamy Bakery-Style Cheesecake

    The biggest secret to smooth cheesecake is temperature.

    Cold cream cheese does not blend easily and can leave small lumps throughout the filling.

    For this reason, cream cheese, sour cream, and eggs should all be close to room temperature before mixing.

    Another important rule is to avoid overmixing.

    When too much air gets incorporated into cheesecake batter, the air expands during baking and then collapses during cooling.

    This can create cracks or an uneven surface.

    Mix slowly and stop as soon as the ingredients are combined.

    Finally, avoid overbaking.

    The center should still move slightly when the cheesecake comes out of the oven.

    If the center is completely firm while still in the oven, the cheesecake may become dry after cooling.

    Why Fresh Lemon Makes a Difference

    Fresh lemon juice is strongly recommended for this recipe.

    Bottled lemon juice can work in some recipes, but fresh lemons provide a much brighter flavor.

    The zest is equally important because the aromatic oils in the lemon peel contain concentrated citrus flavor.

    When zesting lemons, remove only the yellow outer layer.

    Avoid the thick white layer underneath because it can taste bitter.

    For even more lemon flavor, gently rub the lemon zest into the sugar before adding it to the cheesecake mixture.

    This releases the natural oils from the zest and distributes the flavor throughout the filling.

    How to Prevent Cheesecake Cracks

    Cracks do not affect the flavor of cheesecake, but there are several ways to reduce the chances of them forming.

    First, use room-temperature ingredients.

    Second, avoid overmixing the eggs.

    Third, bake the cheesecake gently at a moderate temperature.

    Fourth, allow it to cool gradually.

    Sudden temperature changes can cause the cheesecake to contract too quickly.

    Even if your cheesecake develops a small crack, there is no reason to worry.

    The lemon curd topping can easily cover small imperfections.

    How to Slice Cheesecake Cleanly

    For beautiful slices, make sure the cheesecake is completely chilled.

    Use a long, sharp knife.

    Dip the knife into hot water and wipe it dry before making the first cut.

    After each slice, clean the knife and repeat the process.

    This prevents cheesecake filling from sticking to the blade and creates smooth, professional-looking slices.

    How to Store Lemon Cheesecake

    Store leftover lemon cheesecake in the refrigerator in an airtight container or covered tightly with plastic wrap.

    It will usually stay fresh for about four to five days.

    Because cheesecake contains cream cheese and eggs, it should not be left at room temperature for extended periods.

    You can also freeze cheesecake.

    For best results, freeze individual slices without delicate garnishes.

    Wrap each slice tightly with plastic wrap and place it inside a freezer-safe container.

    Frozen cheesecake can generally be stored for one to two months.

    Allow it to thaw overnight in the refrigerator before serving.

    Can You Make Lemon Cheesecake Ahead of Time?

    Yes, and making it ahead is actually recommended.

    Cheesecake needs several hours to chill completely before serving.

    Preparing it the day before gives the texture enough time to become firm and smooth.

    You can prepare the cheesecake one day and add the lemon curd topping the following morning.

    This makes the recipe especially useful for holidays, parties, birthdays, family gatherings, and dinner events.

    What to Serve with Lemon Cheesecake

    This cheesecake is delicious on its own, but you can also serve it with several simple toppings.

    Fresh strawberries, raspberries, or blueberries pair especially well with lemon.

    A spoonful of lightly whipped cream adds extra richness.

    For a simple presentation, decorate the cheesecake with thin lemon slices or small curls of lemon zest.

    Fresh mint leaves can also add contrast if desired.

    Avoid adding too many toppings because the lemon cheesecake already has plenty of flavor.

    Frequently Asked Questions

    Can I use bottled lemon juice?

    Fresh lemon juice provides the best flavor, but bottled lemon juice can be used when fresh lemons are unavailable.

    Why did my cheesecake crack?

    Cracking can happen because of overmixing, overbaking, or cooling the cheesecake too quickly.

    A water bath and gradual cooling can help.

    Can I make this cheesecake without a water bath?

    Yes. The cheesecake can still turn out delicious without a water bath. However, a water bath can improve the texture and reduce cracking.

    Can I use digestive biscuits instead of graham crackers?

    Yes. Digestive biscuits make an excellent cheesecake crust and provide a slightly richer flavor.

    How long should cheesecake chill?

    Allow at least six hours, although overnight chilling usually produces the best texture.

    Can lemon curd be made ahead?

    Yes. Lemon curd can be prepared several days in advance and stored in an airtight container in the refrigerator.

    Final Thoughts

    This creamy lemon cheesecake with homemade lemon curd proves that an impressive dessert does not have to be complicated.

    The buttery crust provides a delicious foundation, the lemon cheesecake filling is smooth and creamy, and the homemade lemon curd adds the fresh citrus flavor that makes every bite memorable.

    The most important steps are simple: use room-temperature ingredients, avoid overmixing, bake gently, cool gradually, and give the cheesecake enough time to chill.

    Once you follow those techniques, you can create a beautiful homemade lemon cheesecake that looks like it came from a bakery.

    Serve it for a special celebration or simply enjoy a slice with coffee after dinner.

    Either way, this is one lemon cheesecake recipe you will want to make again.